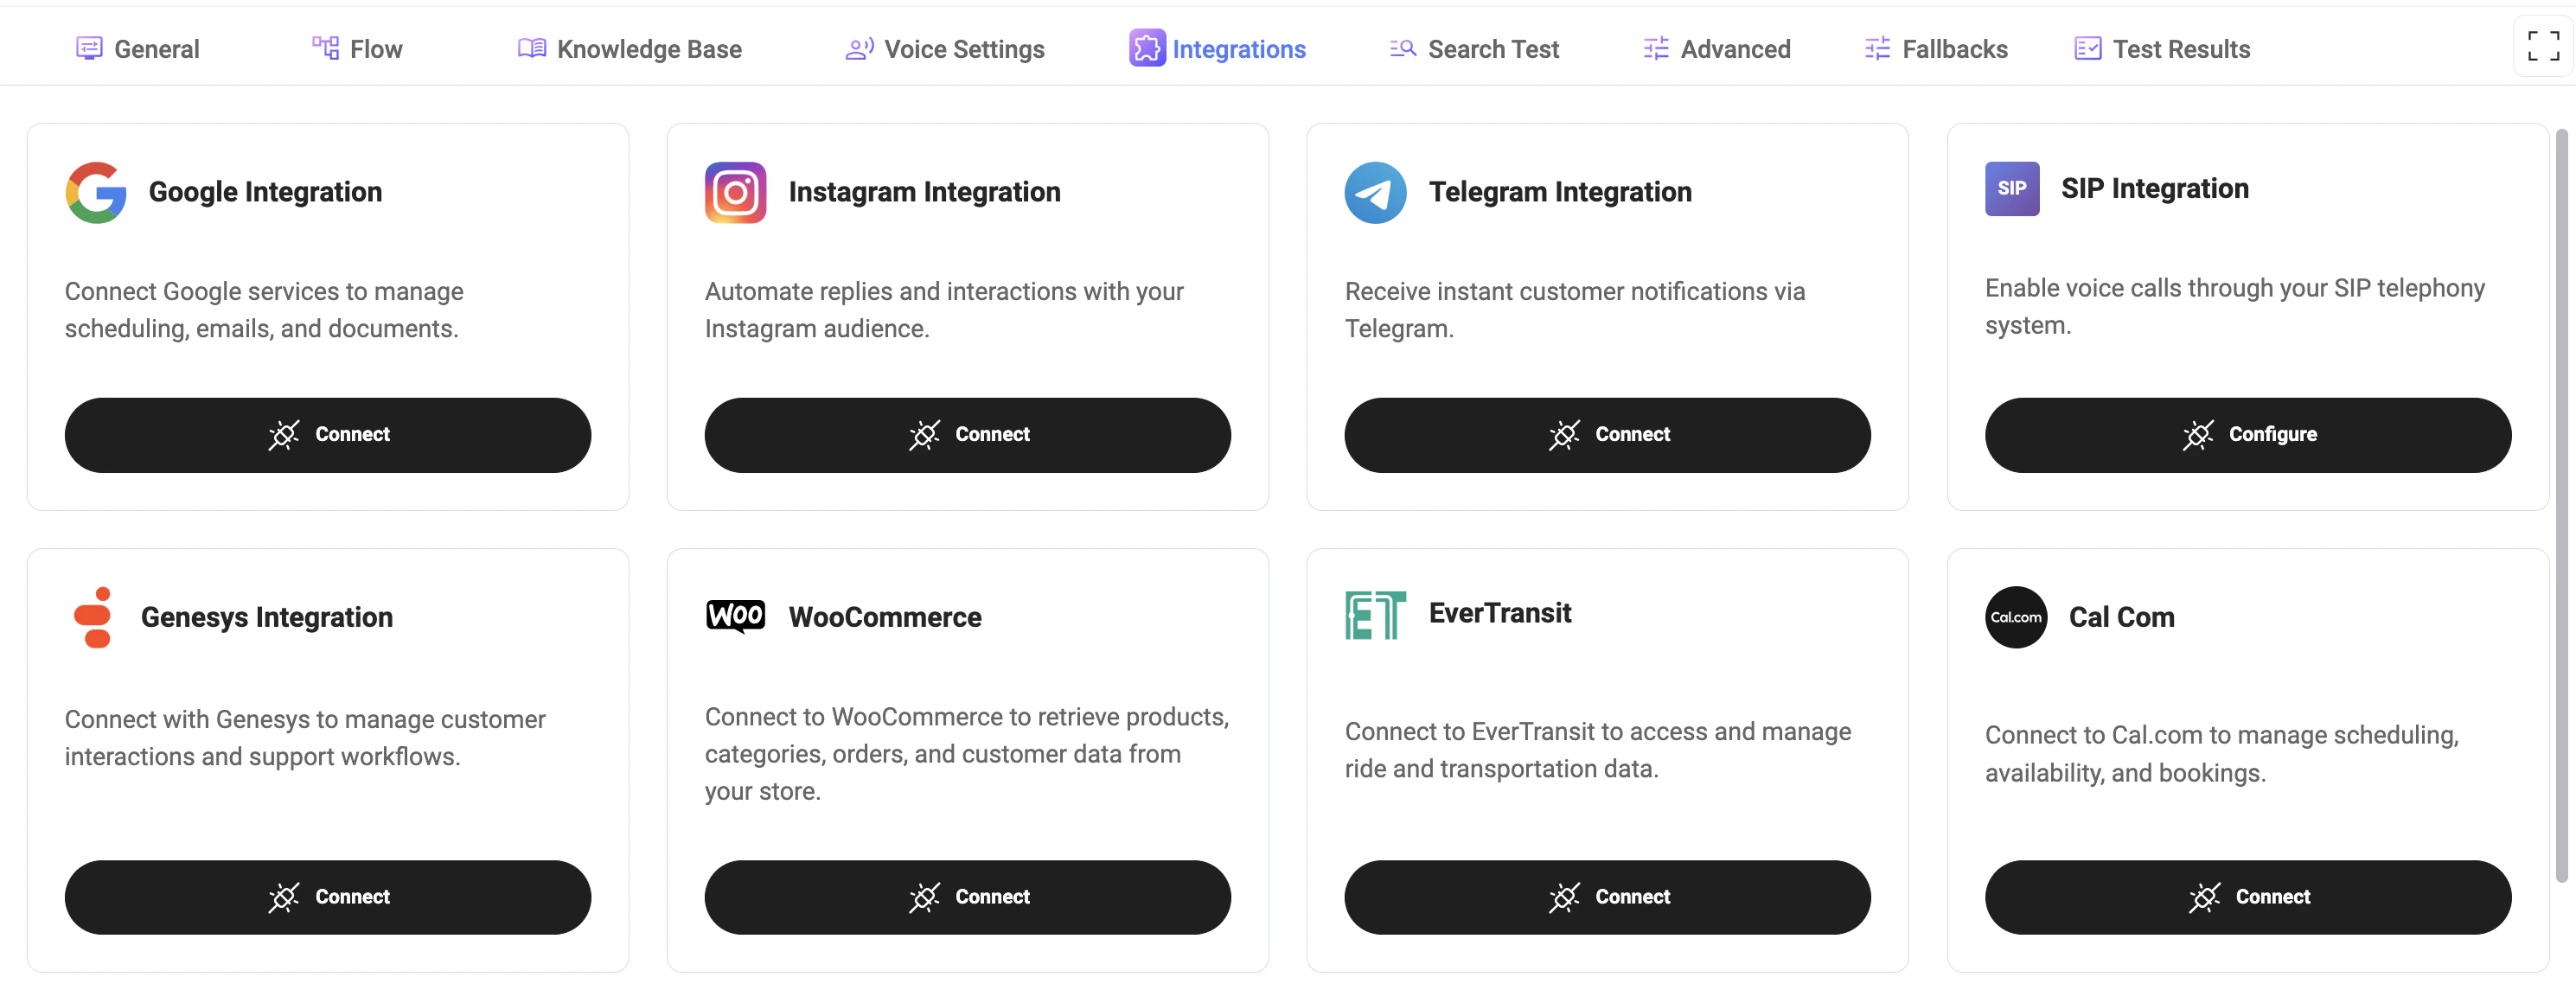
Available Integrations
You can connect a variety of services to enable different features:Integrations
Integrations connect your assistant with external platforms and services.They allow the assistant to access data, trigger actions, manage bookings, send messages, handle calls, and automate workflows across different systems. Use integrations when your assistant needs to interact with third-party tools such as calendars, email, telephony, booking platforms, e-commerce systems, or customer communication channels.
Google
Google integration allows the assistant to work with Google services such as scheduling, emails, calendars, maps, and connected workspace tools.
It can be used to manage calendar events, search or update information, send emails, calculate routes, and interact with connected Google Workspace services.
Authentication
To connect Google integration:- Open the Integration configuration
- Click Connect Google
- You will be redirected to the Google authorization page
- Sign in with your Google account
- Grant the requested permissions
- After successful authorization, the integration becomes available for actions and tools
Google authentication uses OAuth authorization flow and may require additional permissions depending on enabled actions.
Supported Features
- Google Calendar management
- Gmail integration
- Google Maps actions
- Route and distance calculations
- Address autocomplete
- Calendar event search
- Calendar event creation and updates
- Email sending
- Workspace synchronization
Notes
- Valid Google authorization is required before using Google actions.
- Some features may require Google Workspace permissions.
- Access permissions depend on the connected Google account.
Instagram
Instagram integration allows the assistant to automate replies and interactions with your Instagram audience.
It can be used to respond to messages, support customer conversations, automate communication workflows, and manage communication through Instagram Direct Messages.
Authentication
To connect Instagram integration:- Open the Integration configuration
- Enter the required Instagram integration credentials
- After successful setup, Instagram actions and automations become available
Instagram integration requires a properly configured Instagram Business or Creator account.
Supported Features
- Instagram Direct Message automation
- Automated replies
- Customer communication workflows
- AI assistant conversations
- Message handling and routing
- Lead collection and engagement
Notes
- Valid integration configuration is required before using Instagram actions.
- Personal Instagram accounts may not be supported.
- Available features depend on connected account permissions.
SIP
SIP
SIP integration enables voice calls through your telephony system.It allows the assistant to connect with external SIP providers, route calls, and support voice-based communication workflows.Example:
TheExample:
SIP URI
The system generates a SIP URI automatically:Extension
- Can be generated automatically
- Used as an internal routing identifier
Enable Integration
Enable the Enabled checkbox to activate SIP.Method
Target URI
Defines the destination for SIP call routing.The Target URI tells the system where to send the call (typically your SIP provider or PBX).The
${extension} placeholder is automatically replaced with the configured extension during the call.Genesys
Genesys
Genesys integration helps manage customer interactions and support workflows.It can be used to connect the assistant with contact center processes, customer service flows, and support routing logic.
WooCommerce
WooCommerce
WooCommerce integration allows the assistant to access e-commerce data such as products, orders, and customer information.
It can be used for order checks, product-related questions, customer support, and store automation workflows.
Configuration
To connect WooCommerce integration, configure the following fields:Example
WooCommerce REST API credentials can be generated in WooCommerce → Settings → Advanced → REST API.
Supported Features
- Product search
- Product information lookup
- Order management
- Customer information retrieval
- Store automation workflows
- AI-powered customer support
- Order status tracking
Notes
- Valid WooCommerce REST API credentials are required.
- WooCommerce REST API must be enabled on the store.
- Permissions depend on generated API key access rights.
- HTTPS is recommended for production stores.
EverTransit
EverTransit
EverTransit integration allows the assistant to manage ride and transportation data.
It can be used for transportation workflows, reservation details, ride updates, booking-related automation, and dispatch operations.
Configuration
To connect EverTransit integration, configure the following fields:Example
The API key is provided by EverTransit and is required for all transportation and reservation actions.
Supported Features
- Ride reservation management
- Reservation status lookup
- Transportation workflows
- Ride updates and automation
- Dispatch-related operations
- Customer ride information retrieval
- Booking management
Notes
- Valid EverTransit API credentials are required.
- API permissions depend on your EverTransit account configuration.
- Some features may depend on enabled EverTransit modules.
- Incorrect or expired API keys may cause request failures.
Cal.com
Cal.com
Cal.com integration allows the assistant to handle scheduling, availability, and bookings.
It can be used to check available time slots, create bookings, reschedule appointments, cancel meetings, and manage appointment-based workflows.
Configuration
To connect Cal.com integration, configure the following fields:Example
The API key can be generated from your Cal.com account settings and is required for all booking and scheduling actions.
Supported Features
- Search available slots
- Create bookings
- Cancel bookings
- Reschedule bookings
- Retrieve booking information
- Appointment automation workflows
- Calendar synchronization
Notes
- Valid Cal.com API credentials are required.
- Calendar availability depends on connected calendars inside Cal.com.
- Timezone handling may affect returned availability slots.
- Incorrect or expired API keys may cause request failures.
Send Email (SMTP)
Send Email (SMTP)
Send Email integration allows the assistant to send emails directly from your system using SMTP.
It can be used for confirmations, notifications, summaries, follow-ups, and internal team updates.
Configuration
To use SMTP email, you need to configure at least one connection.Required fields
-
Connection Name
Type:string
Internal name for the SMTP connection. Example:Gmail SMTP -
SMTP Host
Type:string
Address of your email provider’s SMTP server. Examples:smtp.gmail.comsmtp.office365.com
-
SMTP Port
Type:number
Port used for SMTP connection. Common values:465— SSL587— TLS25— (not recommended)
-
SMTP Authorization
Credentials used to authenticate with the SMTP server.
-
Username
Type:string
Usually your email address -
Password
Type:string
Email password or app-specific password
-
Username
Multiple connections
You can configure multiple SMTP connections.Use this when:- Sending emails from different addresses
- Supporting multiple clients
- Separating environments (e.g., staging / production)
Notes
- Use app passwords for providers like Gmail
- Ensure SMTP is enabled in your email provider settings
- Incorrect credentials will prevent email delivery
- Port and security type must match provider requirements
Emails will not be sent without a valid SMTP configuration.
Syrve
Syrve
Syrve integration allows the assistant to access restaurant data and integration settings.
It can be used for restaurant workflows, operational data management, reservation handling, order tracking, and connected service automation.
Configuration
To connect Syrve integration, configure the required API credentials and restaurant settings.Valid Syrve integration configuration is required before using Syrve actions and restaurant workflows.
Supported Features
- Restaurant operational workflows
- Reservation and table management
- Order status retrieval
- Restaurant section management
- Table availability lookup
- Connected restaurant automation
- Customer support workflows
Notes
- Valid Syrve API credentials are required.
- Available features depend on enabled Syrve modules.
- Restaurant-specific permissions may affect accessible data.
- Incorrect configuration may prevent actions from working properly.
G-Net
G-Net
G-Net integration allows you to configure integration settings using API tokens.
It can be used to connect the assistant with G-Net services and enable related automation workflows.
Configuration
To connect G-Net integration, configure the following fields:Example
Valid G-Net API credentials are required before using G-Net actions and automation workflows.
Supported Features
- G-Net service integration
- Automation workflows
- Connected service operations
- API-based communication
- Assistant interaction workflows
- External service synchronization
Notes
- Valid G-Net token is required.
- Permissions depend on the provided API token.
- Incorrect or expired tokens may prevent actions from working.
- Available features may depend on enabled G-Net services.
Altegio
Altegio
Altegio integration allows the assistant to access service categories and booking-related data.It can be used for appointment scheduling, service selection, staff availability, and booking management.Required fields:
- Location ID — your Altegio location identifier
- Partner Token — API access token
- User Token — user authorization token
Tools will not work without valid integration configuration.
How to get Altegio credentials
To configure the Altegio integration, you need to obtain the required values from your Altegio account.Location ID
The unique identifier of your business location in Altegio.Where to find:- Open Altegio dashboard
- Go to Settings → General
- Locate your Location ID (may also appear in the URL or API section)
Partner Token
Used for API access to Altegio services.Where to get:- Go to Settings → Integrations / API
- Generate or copy your Partner Token
User Token
Represents the authorized user for API requests.Where to get:- In API / Integrations settings, generate a User Token
- Alternatively, obtain it via authentication flow if required
Notes
- All fields are required for the integration to work
- Tokens must have proper permissions enabled
- Keep tokens secure and do not expose them publicly
- If tokens are invalid or expired, tools will not function
Connecting an Integration
- Click Connect to authorize and link an external service.
- Follow the authentication steps required by the provider.
- Once connected, the integration becomes available for use in your agent.
- Configure may be required after connection (e.g., SMTP, SIP).
- Additional credentials such as API keys or tokens may be needed.
Integration States
- Connected: Integration is active and ready to use.
- Disconnected: Integration is not active or has been removed.
- Configure: Additional setup is required.
- Coming Soon: Integration is not yet available.
How It Works
- Integrations extend the agent’s capabilities beyond basic conversations.
- They can be triggered within flows or used by tools to perform actions.
- The agent can retrieve, send, or update external data in real time.
- Create bookings via Cal.com
- Send emails via SMTP
- Retrieve products from WooCommerce
- Handle calls via SIP
Best Practices
- Connect only the integrations you need to keep the system clean and secure.
- Ensure all credentials and tokens are valid and up to date.
- Test integrations after setup to verify correct behavior.
- Use integrations together with Flows for automation.
Notes
- Some integrations require external accounts and permissions.
- Missing or incorrect configuration may cause failures in flows.
- Integration availability and features may vary depending on provider.